In My Experience: Best Practices for Interior Surface Prep
15 July, 2020


15 July, 2020
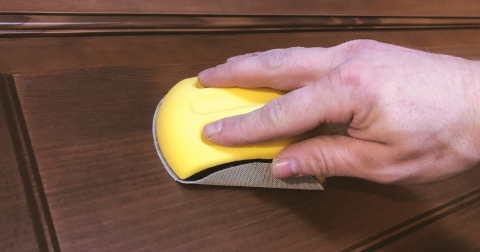
My best practice for interior surface preparation always starts with sanding the trim before applying a coat of primer or paint. This creates the best opportunity for the new coat to adhere, as well as removing any burrs, bumps or roughness on the surface. Then I inspect and look for imperfections in the surface, such as indentations or gouges. Those get skimmed or filled, depending on their depth; then they must be sanded smooth. I always spot prime these areas, so that the patching won’t flash through when finish is applied. Most of the sanding at this stage is done with 120 grit paper. We do a lot of this work by hand sanding, although often you can easily power sand flat trims and doors.
Edges, gaps and seams receive caulking to ensure a proper color separation line. I always check all joints during this phase of prep as well, to make sure there are no cracks or gaps in the package. At this point, I apply my first coat of finish, then I go back into inspection mode. Sometimes, the fresh finish coat reveals minor issues that I may have missed during the sand prep phase. I inspect carefully prior to my second (and usually final) coat of finish to make sure that I haven’t missed anything.It seems like a lot of work – and it is – but it is important in creating the quality paint jobs that I put out. Painting is always the easiest part of the job!
Marcus Henderson - Marcus Henderson Painting - San Jose, CA
We do a lot of new construction painting, and most of our builders use unprimed poplar or maple for their interior trim systems. We prime the back sides of all trims before installation. This helps keep trims from moving due to expansion and contraction from humidity/moisture. This keeps the wood stable and also helps caulked lines not to crack or move over time.
After installing the trims, we mask glass surfaces, fill nail holes, sand all surfaces with 220 grit papers, and spray oil or white pigmented shellac primer on all trim surfaces.
We sand smooth with 220, vacuum, re-fill any lows from knots or nail holes with red Bondo glazing putty, spot sand and vacuum. Caulking is then applied to all lines. In 12 years, Sashco Big Stretch has never let us down, so that is our preferred product. We allow for proper dry time for caulking to cure.
We apply a water-based bonding primer, such as Zinsser Smart Prime or Insl-x Stix, over all trims to help eliminate any flashing from nail hole filler or caulking. Depending on the gloss level of the top coats we will apply one to three coats, level sanding in between applications. Our final primer coat will be sanded level with 400 grit paper in preparation for our topcoats.
We then apply two to four coats of finish, always sanding with 400 grit papers in between coats.
The majority of interior trims are finished in satin finish. Our favorite satin finishes include Benjamin Moore Advance, as well as Eco Satin from Fine Paints of Europe. Both dry hard (impact resistant) and have the ability to move with caulking lines/joints.
Ceilings and walls are all primed with Smart Prime (since it does not gum up our abrasive papers), back rolled and sanded with 180 grit papers, either by means of a Festool Planex sander or 6" orbital. We then spray two coats of Benjamin Moore Ultra Flat, which are then back rolled to all ceilings and finish rolled in one direction to keep nap texture consistent. We absolutely love Graco FF LP airless tips for priming and applying ceiling finish.
For walls, we prefer Benjamin Moore Scuff-X in matte/eggshell or Eurolux Matte by Fine Paints. When necessary (dry heat, large areas or slow laborers) we’ll add extender. We always use 18" microfiber roller covers and always finish in one direction with our roller naps.
Tips:
Use sanding sponges only in corner areas. Try using Velcro hand sanding blocks that accept 5" orbital papers. They are more rigid than your common sanding block so they create a more level surface and don’t dig or lower filled areas.
Take notes! Document everything you do. Label and categorize every step, good or bad. When you run into an issue, you can look at your notes from the last time you completed the process and make sure the same methods are followed and completed. Good Luck!
Benjamin Lambert - Lambert Coatings - Lempster, NH
_0.jpg)


Last week we asked painters, Do you leave the doorknobs on while…
Read Now
Add new comment